The other day I implemented a new feature in a progressive web app built with Vue. The feature enabled the user to create a voice memo from within the app. The browser API I selected for implementation required the app to be served over the https protocol, even in a local development environment. Hence, the need for a SSL certificate for my local Vue app.
As I worked my way through the problem, it turned out this was not the only part of the application in need of some changes. The app under consideration talks to a local Laravel API running on Laravel Homestead. I figured it would be nice to have the API under https as well. Although I wrote a post on exactly that topic a few years back, the steps to create a valid SSL certificate for a Laravel Homestead project are drastically simplified since then.
So in this post you’ll find my approach for setting up a valid SSL for a frontend Vue app communicating with a Laravel API in a local environment.
As a bonus, since I like to use dedicated domain names (even locally), I also write down how we make CORS and Sanctum authentication work.
SSL certificate for a Vue CLI project
The Vue project was created using the Vue CLI. Hence, all configuration goes into the vue.config.js file. Please note that this file is not included in your project by default.
To setup SSL, the (Webpack) docs simply state to add a https item to your devServer configuration. However, it turns out that you should set the https, key and cert properties as direct children of the devServer item like so:
Creating your own SSL certificate
The next step is to create the certificate which consists of two parts: a key and a certificate. Both will be saved in your project, in a hidden directory .certs.
To create the SSL certificate I’ll use mkcert and I install it using Homebrew. This is the command:
> brew install mkcert
followed by
> mkcert -install
If you are working in Firefox you need nss as well, homebrew will let you know, just follow the tips.
Next we create the hidden folder .certs. Run this from your project root
> mkdir -p .certs
And finally, here is the command to create the key and certificate:
> mkcert -key-file ./.certs/key.pem -cert-file ./.certs/cert.pem “app.plintapp.local”
Please note that I added the domain name app.plintapp.local. If you are running your project on localhost you can simply call it localhost instead. The most important is that the name of the certificate matches the url you visit in the browser to work on your app locally.
Running the app locally
With the changes added to vue.config.js, run npm run serve again to make sure the changes are picked up. Then visit your app with https and you are good to go.
Deployment to production
However, once I deployed this new piece of code to the server, and tried to build the app with the npm run build command, it failed. It could not find the certificates because I explicitly excluded the .certs folder from version control by adding it to the .gitignore. I did not realize that the build command also checked the devServer configuration in the vue.config.js but apparently it does. So I needed a way to reset it for production. In the end I came up with this solution. Not particular beautiful, but it works:
Please note that the production app does use a SSL certificate but that is configured on the server and outside the scope of this article.
SSL for the API
As I mentioned in the introduction, the app talks to a Laravel API running on Laravel Homestead. It features Laravel Sanctum for authentication and it has Cors enabled to make sure that the requests coming from the app are safe. I configured the hostname api.plintapp.local for this part of the project.
For a couple of years, Laravel Homestead projects have come with self signed SSL certificates. However, the browser does not always think these certificates are valid. Very annoying and it can take ages to find the correct solution. Again it took me too much time, so I wrote this down.
You have to make your browser trust the certificate given to you by Homestead. In Chrome, the steps are as follows (Please note: I applied these steps for another site to get the images below as I already managed to make it work for the API when investigating this):
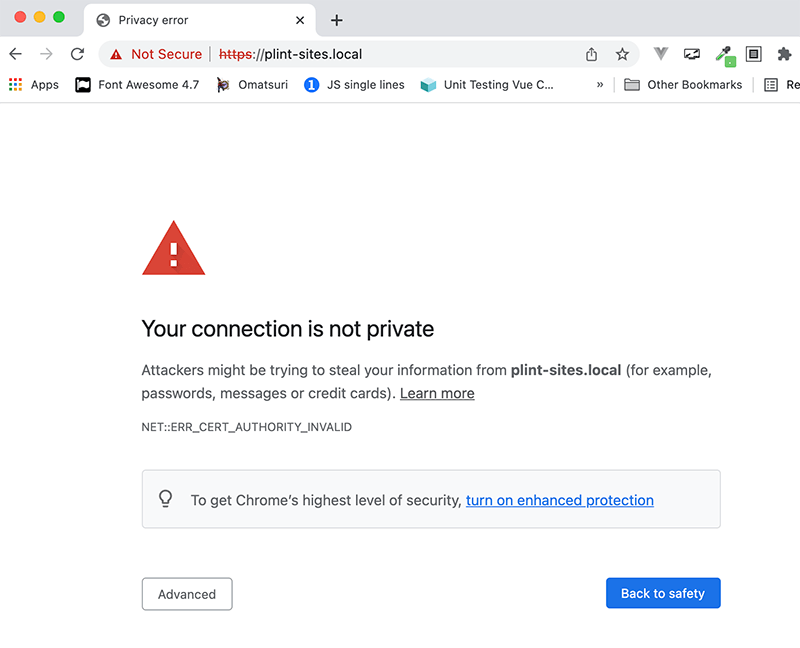
1. Visit your app. For me it’s https://plint-sites.local. You’ll get the ‘not secure’ warning

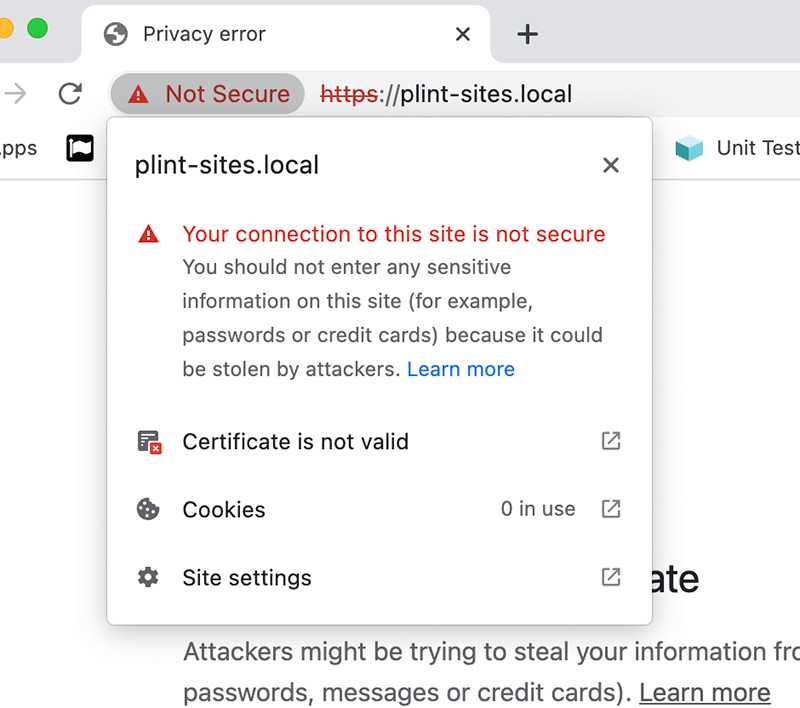
2. Click on the red triangle in the URL bar

3. Then click the ‘certificate is not valid’ message. It opens a popup window. Now drag the certificate (the one with the blue border to the left of ‘plint-sites.local’) to your Desktop

4. Next, double click the certificate on the Desktop, it opens the Keychain program on your mac.

5. Select the certificate and double click to open it. In the Trust section select ‘Always Trust’ and close this popup. You are prompted for your password.

6. Now you should see the white/blue plus icon next to your certificate. This means your certificate is now valid according to your browser.

7. Check your website to verify the not secure warning is gone.
Fixing Cors and Sanctum
After the changes to the frontend Vue app and the Laravel Homestead API, I thought I was finished. However, the app stopped working. I noticed Cors errors in the development console and I was unable to sign in.
The Cors error is a direct consequence of the change from the http to the https protocol. If you have Cors configured in Laravel, you’ll have a config/cors.php file. It’s the allowed_origins key here that is important: it lists the domains you accept requests from. In my case, I configured it to read the list of domains from the .env variable CORS_ALLOWED_ORIGIN. But of course, the value was still written with the http protocol.
A simple change in the end. Please note that using the .env file to configure the allowed origins enables you to allow your local domain when working locally and the real website domain for the production environment.
For the sign in, the culprit turned out to be the base url for the axios library which still used the http protocol.
Conclusion
In this post I described the process for adding a self-signed SSL certificate to your Vue app. It’s easy to create a certificate for your project using mkcert. For Laravel projects, the certificates are already handled for you. However, it takes a little effort to make your browsers trust them. But by changing the ‘trust’ via the Keychain program, you are good to go within a minute.

